The steps taken to create Great Ten #4 Page 13 - INCLUDING REVISING PANEL 4!
This 4-step process, which I have compared to sculpting on paper, provides great creative flexiblity. My normal working routine includes sharing my detailed LAYOUTS with my editors and writer, which is absolutely terrific for several key reasons:
- From experience, I've found that achieving the LAYOUT is just about the MIDPOINT in the completion of the page. For example, if a page takes 10 hours to fully complete, I usually complete the layout in around 4-6 hours. Better to find the mistake in the blueprint before you construct the building!
- At the layout stage, EVERYTHING is fairly easy to adjust (relative sizes of panels, content of panels). One great idea for one panel may have implications on all the others (say, making one specific panel a bit larger may require shrinking the remaining panels a little bit), and these changes are a snap to implement at the layout stage. Even if you have to REDRAW the contents of a panel from another angle, it's far more efficient to do it at the LAYOUT stage as compared to the FINISHED PENCIL stage!
- Your editors and writer are professional storytellers who have tremendous expertise in visual storytelling. They often make excellent suggestions to find a superior shot.
- Your editors and writer serve as visual proof-readers, helping to catch any visual mistakes!
I chose this page because it shows an example of editor Michael Siglain suggesting a superior angle for a key shot, and you'll see how easy it was to implement the idea.
Let's get started!
|

Starting place: Script
|
STARTING PLACE: SCRIPT
At left is the script for this story page written by the excellent writer Tony Bedard. Read it over a few times, to make sure you understand the action occurring here.
Try to get a picture in your mind of the action occurring on this page, as if you are standing amidst the action. In your judgment, which panel seems the most significant (that is, the panel that contains the most important story information, or contains the most dramatic moment on the page)? How would YOU compose the panels on the page? Where would YOU place the cameras? When you feel you have a firm idea of the action on the page, proceed!
|
|
|
STEP 0 - DESIGN AND REFERENCE
Again, each story is going to present you with design and reference challenges. I find that I work more efficiently if I do the majority of this work BEFORE actually drawing the story.
|

Feng Po
|
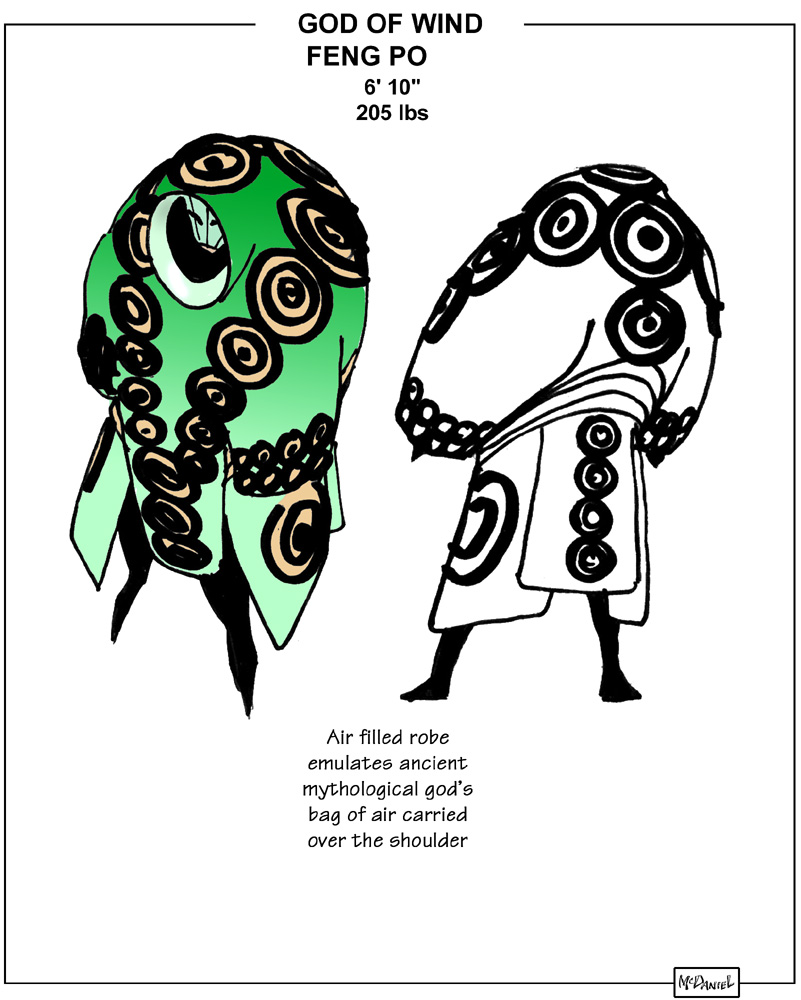
DESIGN
Each story will feature never-before-seen objects or characters, and it is the penciller's job to create the visual for these objects.
While the design work for Feng Po was done as part of the effort for issue #1 (recall he first appeared on # 1 page 21), at left is the design model sheet I prepared for him. As you can see, I am a Photoshop novice, but I know enough to get my ideas communicated to the colorist!
And, as a result of the entire creative team having excellent communication and collaboration, the idea of the gradient on the outer robe was from our tremendously talented color artist Tanya Horie !
|
Step 1 - thumbnail sketches
|
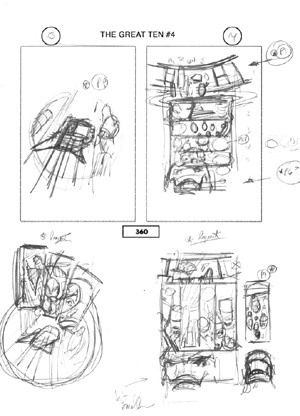
STEP 1 - THUMBNAILS
Please play the games QUESTIONS # 1 - 3 for a more detailed explanation of the benefits and purposes of working thumbnails as the first stage.
You will see my thumbnails for this page at left. Simply put, after studying the page, I determined that panel 4 was the most dramatic. I chose panel 4 to dominate the page.
Notice panel 4's camera angle: it is placed in the sky, pointed up at the action. For me, the simple phrase "He's gesturing, causing a tornadic stream of wind to spiral up from below, carrying debris..." created a clear mental image, a POV looking UP FROM BELOW!
Yup, at this point, I'm reminded of that scene in STAR WARS where Obi Wan was having a field day with the Stormtrooper's weak minds ("You don't need to see his identification. These aren't the droids you're looking for...")!!
|
Step 2 - sketch
|
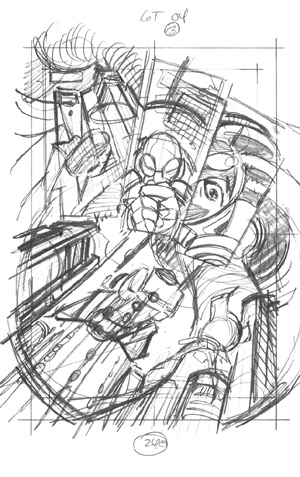
STEP 2 - SKETCH
Please play the games QUESTIONS # 1 - 3 for a more detailed explanation of the benefits and purposes of working a SKETCH directly from the THUMBNAILS.
You will see my sketch for this page at left.
In panel 4, we see the DRAGONWING, FENG PO, SHANGHAI BUILDINGS, TORNADO VORTEX, and DEBRIS jetting up from below. Everything seems in order. More on this in a moment!
|

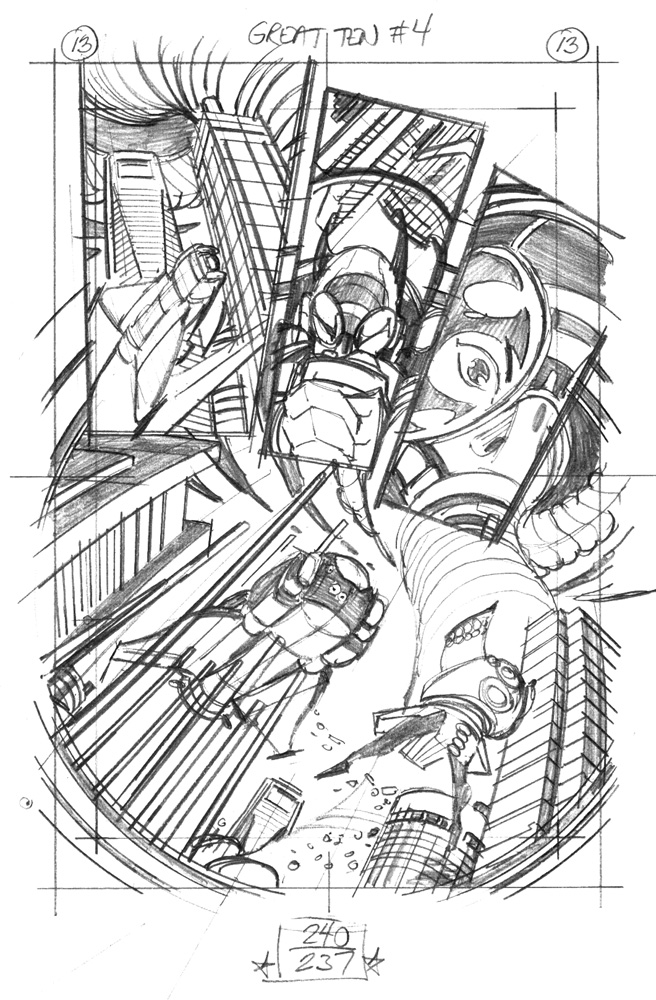
Step 3 - layout
|
STEP 3 - LAYOUT
Please play the games QUESTIONS # 1 - 3 for a more detailed explanation of the benefits and purposes of working a LAYOUT directly from the SKETCH.
The LAYOUT is tight enough to provide a clear indication of the elements in each panel. At this point, I sent this layout (in a batch with 5 or 6 other page layouts) to editors Michael Siglain, Harvey Richards, and writer Tony Bedard for their review, comment and approval before moving to the next and final stage - pencilling.
Upon review, editor Michael Siglain suggested that a better view for panel 4 would be from a higher camera looking down, so we actually see the debris getting caught up from the street level and aimed at the DRAGONWING.
OF COURSE!! Why didn't I think of that?? I guess that's why they pay Micheal the big bucks!
|
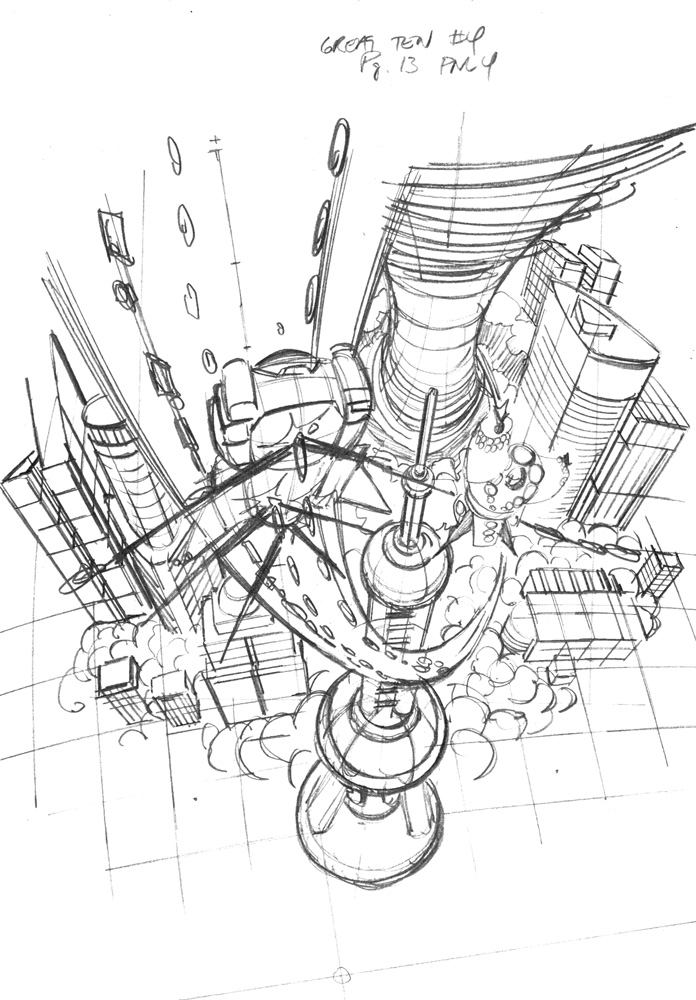
Step 2 - sketch REVISION!
|
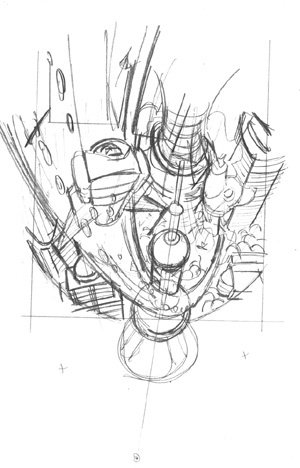
STEP 2 - SKETCH REVISION
You will see my sketch revision for panel 4 at left.
I did this quick sketch directly over the initial LAYOUT to get a feel for the image size and shape. I chose to view the action from just behind the Oriental Pearl Tower, looking inland towards the WFC and Jinmao Towers.
It's now clear: this shot possess all the story information of the first version, and ADDS the information of the source of the debris.
What's more, this shot possesses FAR more depth than the first version, creating an even more dramatic image!
Thanks, Michael!
|

Step 3 - layout REVISION
|
STEP 3 - LAYOUT REVISION
The only question remaining in my mind was how to best crop the new shot into the allotted space. To achieve max flexibility, I rendered the REVISED LAYOUT on a separate sheet. You'll see it at left.
I use PHOTOSHOP for scanning and composition purposes just like this. Once the REVISED LAYOUT was complete, I simply replaced it on the INITIAL LAYOUT and experimented with different zooms to find the cropping I liked best.
|

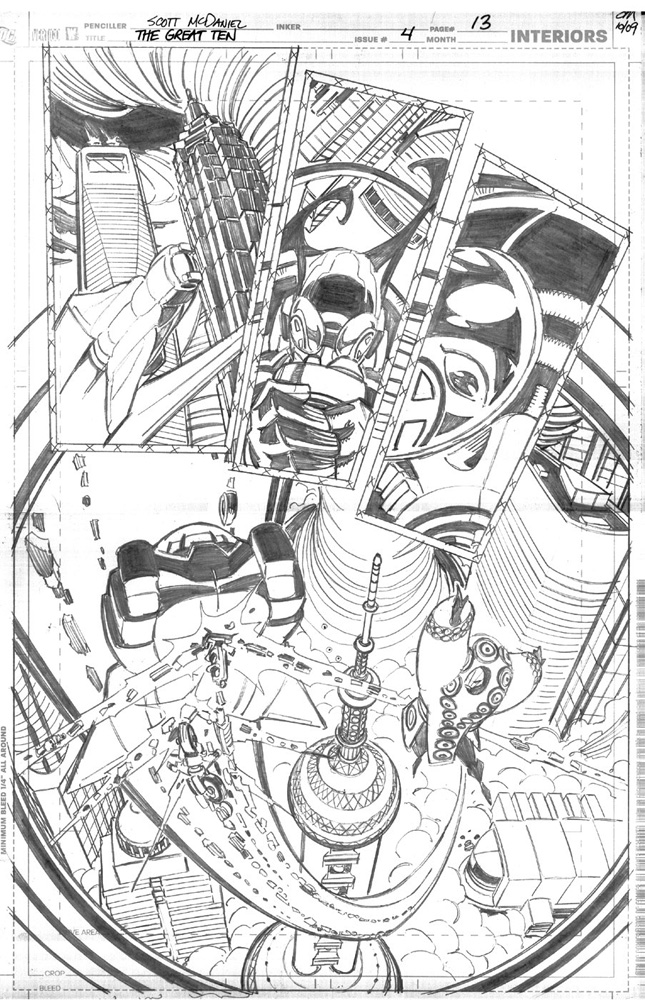
Step 4 - finished pencils
|
STEP 4 - FINISHED PENCILS!
Please play the games QUESTIONS # 1 - 3 for a more detailed explanation of the benefits and purposes of working the FINISHED PENCILS directly from the LAYOUT.
MICHAEL's idea was terrific. The resulting shot is far more dramatic, it contains more story information, and it gives us a very nice look at another iconic Shanghai building - The Oriental Pearl Tower!
|
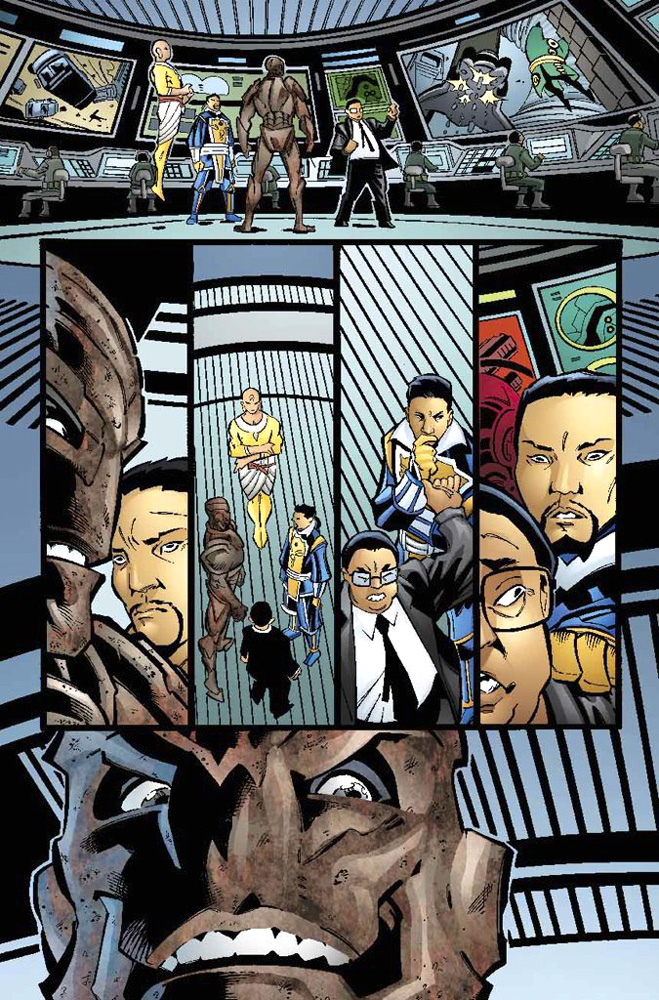
The finished product!
|
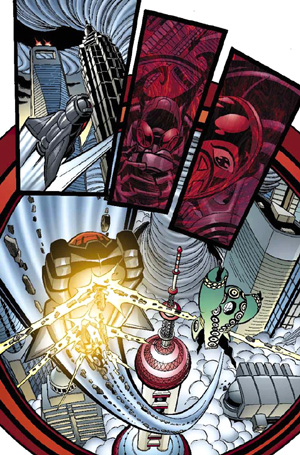
THE FINISHED PRODUCT!
The stunning color art was rendered by Tanya and Rich Horie.
The strong inking was provided by Andy Owens.
|
BONUS SECTION!
Page 14 - sketch
|
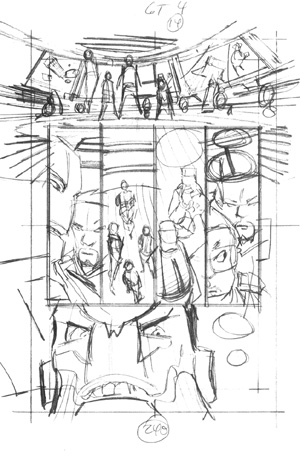
PAGE 14 - SKETCH
At left you will see the SKETCH for page 14.
This action takes place inside the Great Ten's Great Wall Complex HQ. They are watching the events in Shanghai we just drew on page 13.
Originally, I intended the panel 1 screen monitors to duplicate the view of page 13 panel 4. Notice the hidden benefit gained by changing page 13: by keeping the camera as originally intended here on page 14, we show the reader another - but different - look at the same action. It makes the visual storytelling richer!
|
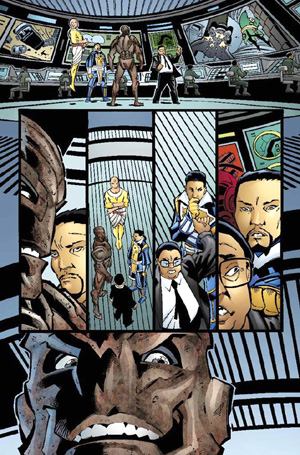
Page 14
|
Just thought you'd like to see the effect on the finished page!
|